
Ready to go all technical on this one? If you are a teacher, we bet you are already pretty familiar with creating quizzes for your students. And Google Forms can be an excellent option for making quizzes. But how do you create a Google forms quiz?
Apart from being just free, Google forms come with many features. It is easy to navigate and offers in-built templates. You can also use its point feature to make grading easy and automated.
Here’s a step-by-step guide on creating a Google form quiz for students. Read on to also discover the advantages and limitations of using this app.
Creating Self-Grading Google Forms Quizzes
Creating self-grading quizzes is just a few clicks away. Follow the below steps to get started.
Step 1: Creating A New Form
Visit Google Forms’ official website. Under the “Start a new form,” click “Blank” to start from scratch. You can also choose from templates by browsing other options on your right.
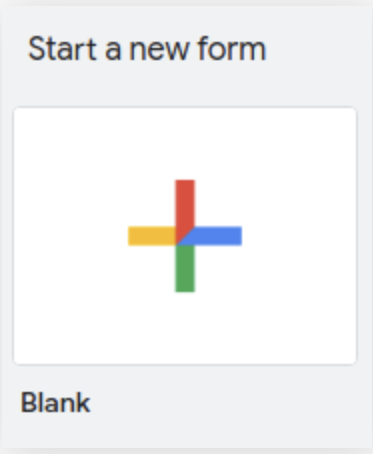
Once you click “Blank,” you will be redirected to a new, untitled form. Your next step would be navigating the settings.
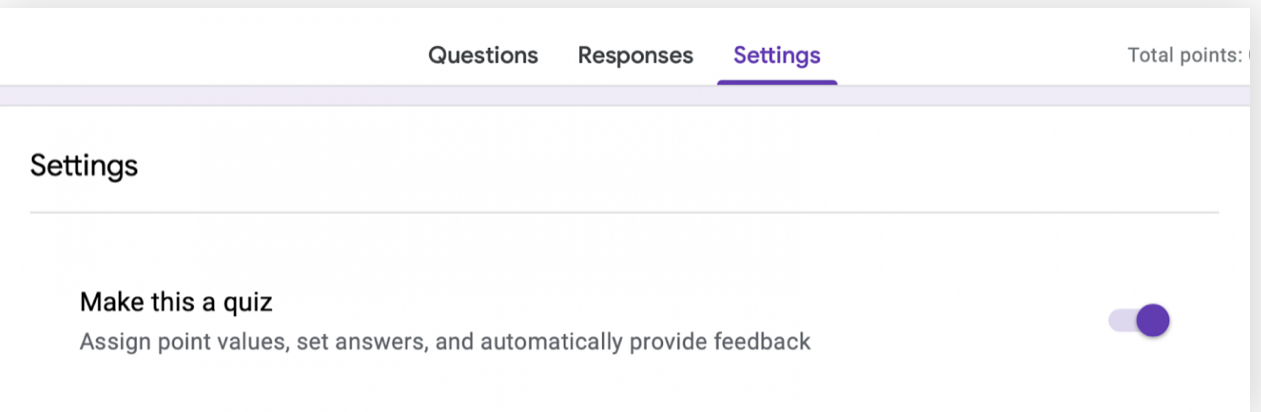
Step 2: Navigating Settings
Go to the setting panels located in your top bar. Enable the “Make this a quiz” option. This will convert your new form into a quiz.
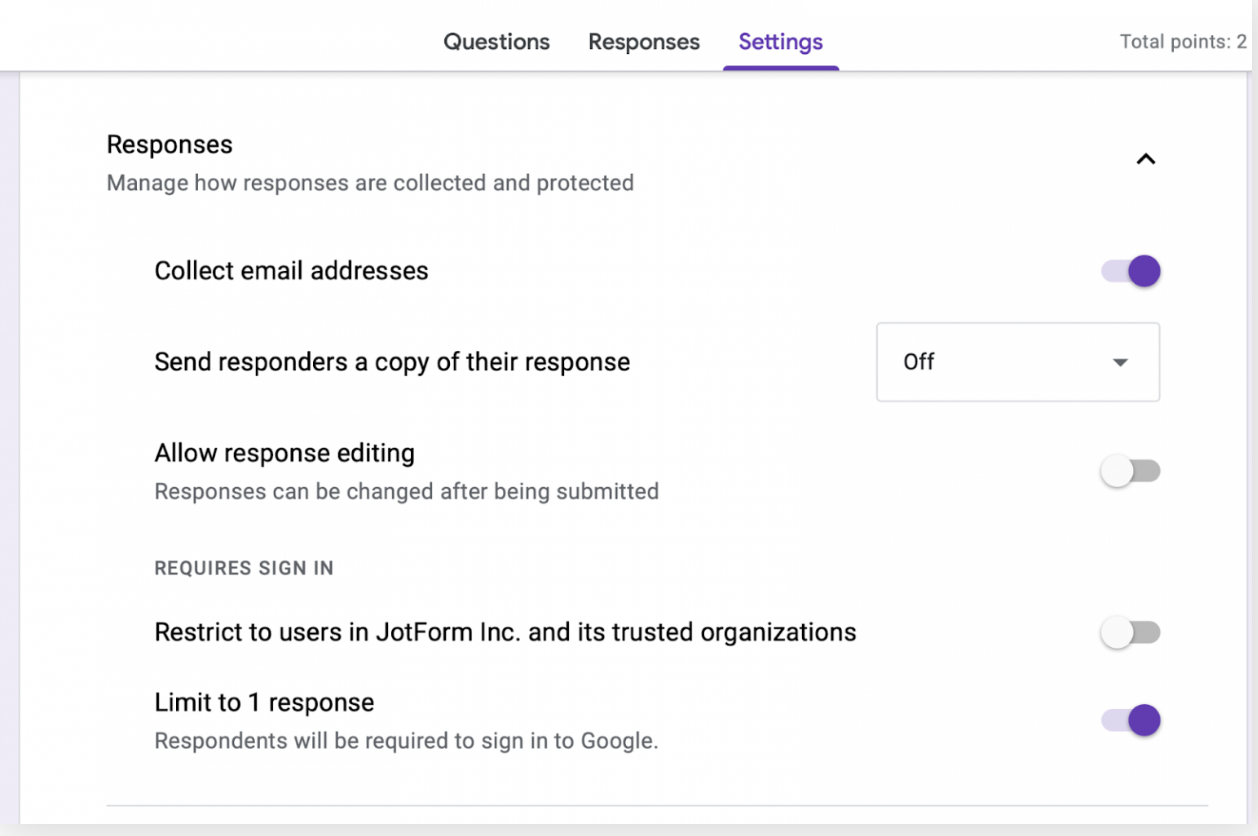
After enabling the “Collect email address” option, the next step is to enter the email address. You can also limit your responses to just one email. As a result, duplicate work will not be created and the likelihood of cheating will be decreased.
- You can also enable the automatic grading option from the settings channel, allowing your students to see the results once they have submitted all responses directly. However, if not required, you can also disable this option.
- You can also navigate the settings panel to make your quiz better. Certain features like adding pot value to every question would allow the respondents to see what every question is worth.
- Once you are done with the settings, visit the “Question” tab from your top panel. Once you visit this panel, you’ll see an Untitled form with an email collection field.
- Replace the dummy form title with the title of your quiz. You can also add some description text, giving your respondents a look into what this quiz is all about.
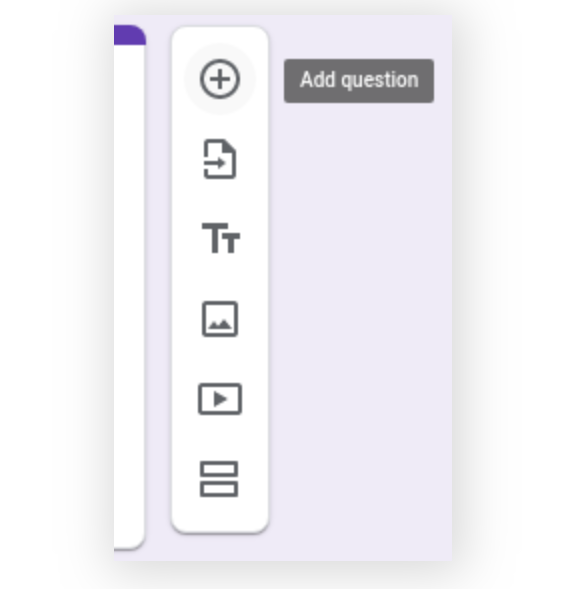
Step 3: Adding Questions
The next step would be adding questions. To add a new question, click on the small “+” icon located in the side menu.
- Once you click on it, you will be able to see different question types offered by Google forms. For instance, if you want to ask your respondent’s name, click on a short answer and change the question text to “Your Name.” You can also make this question mandatory to fill out by enabling the “Required” option.
- If you want to add another short question, simply duplicate the question and replace the question text with your question. In case you don’t want to make this question mandatory to fill out, disable the required option.
- MCQs and Dropdown are some of the close-ended questions you can add, aside from short answer and long answer questions.
- After adding all the questions, you can drag and drop a specific question to re-adjust the order. Simply click on the six dot option on the side menu to do so.
- Moreover, you can also enable the “Shuffle Order” option to prevent cheating cases.
Step 4: Weighing & Grading
It’s time to grade the questions. Once you are through with adding questions and enabling several setting options, go to the answer key. It is located at the end of all questions.
- Upon clicking “Answer Key,” you will be redirected to another page where you can set the correct answer. Here, you can assign a point to each question. If you are not creating a google form quiz for friends, you can weigh all options differently. Thus, harder questions can be assigned a higher value.
- To offer a unique experience, you can also add a “Add answer feedback” button at the bottom. This will allow your respondents to understand why a specific answer choice is a right. You can also add a different response for an incorrect or correct option, allowing them to access new information.
Step 5: Quiz Preview
Once done, give your quiz a thorough read. Preview it closely and re-edit anything, if required. You can also test it by taking the quiz on your own. To preview, click on the small eye icon in the top-right corner.
Step 6: Gathering Responses
- After you have previewed the quiz, enter the form builder tab. Click “Send” to send the quiz to your respondents.
- Click on the “Responses” tab at the top of the form. Usually, you can find three tabs in the Response tab- Summary, Question and Individual. The summary tab will provide comprehensive information on all the quiz responses.
- The question tab will show how every respondent answered each question. Moreover, if you plan to see the responses according to every respondent, click on the Individual tab.
- You can also export the entire data to a Google sheet by clicking on the green spreadsheet button in the corner.
Reasons To Use Google Forms Quiz
Google forms can be a great option if you plan to create an online form without paying anything. It’s easy, affordable and fun to use.
Here are some advantages of why you should be using Google forms:
Unlimited, Free Forms
From free polling to highly interactive surveys, Google forms allow you to create free forms, polls, surveys, and quizzes at no cost. All you honestly need is a Google account.
Highly Collaborative
Google forms are highly collaborative. Once you have created the survey and received responses, you can add collaborators to your survey/form.
Conditional Logics
By clicking on “Go to selection based on the answer,” you can add logic to your question. This would enhance the overall performance of the survey and increase its response rate.
Email Notifications
You can also get email notifications for every new response by enabling this option in the settings. Moreover, it’s pretty easy to add this option.
Limitations Of Google Forms Quiz
Google forms are indeed free and easy to use. However, they do come with their own set of limitations. Here are some of them:
Limited Customization
When it comes to customization, Google forms offer very limited customization features. You can only change color, font type or theme.
Limited Uploading Features
If a respondent tries to upload a document, that document must only be in the acceptable format. You can only upload PDFs, images and audio files to the forms.
Limited Question Types
As for question types, you don’t get much choice. You can only access some basic questions.
Lack of Features
Apart from a little template gallery, you also won’t have access to additional features like other online survey-making platforms might offer.
Searching For A Google Form Alternative?
It’s indeed true that the steps to create a Google forms quiz are easy. However, if you are on the search for better options, SurveyPoint is something you can try. Apart from a wide variety of templates, you can also access various question types. With custom analytics, you can also add advanced conditional logic and track the responses in real time.
Tired of creating forms that never seem to get the response you’re looking for?
Let’s create a form that your audience actually wants to fill out.
No Payment Details Required • Cancel Anytime
