Anaglyph 3D is a method for producing 3D images that are among the earliest and most basic. Movies from the 1950s, 1960s, and even the 1970s used this kind of 3D as a gimmick to captivate audiences and make them feel more engrossed in the story. Fortunately, you can now achieve the desired effect with tools like Photoshop.
Opting for the anaglyph effect Photoshop can help transform your traditional pictures and turn them into movie-like visuals. Anaglyph 3D has maintained its appeal with movies, television shows, and social media titans like Youtube, even as technology has advanced and changed over the years.
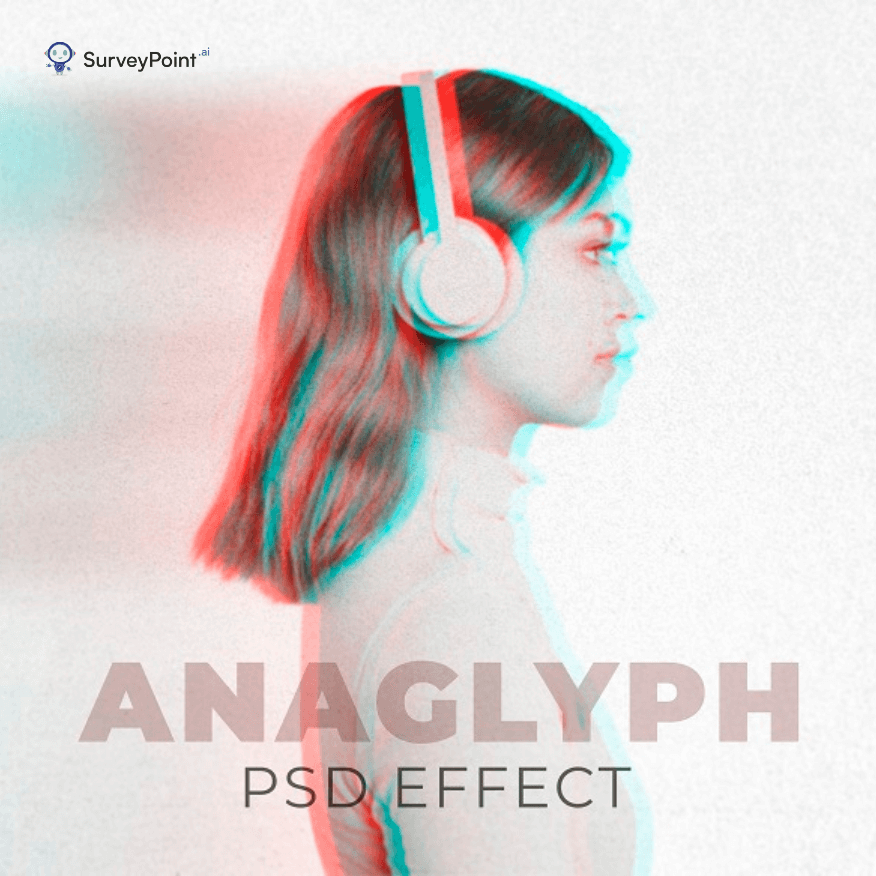
Anaglyph Image
Do you see a double image by superimposing two pictures—one with a red filter and the other with a cyan filter?
When you take a three-dimensional image, an anaglyph image is what you have here. An anaglyph text generator includes red and blue lenses that correlate to the filtered images, like the ones you presumably received during a 3D movie as a child. Your brain completes the task of creating a 3D illusion by combining the two overlay images.
Though it can seem complicated, if you know how to use some fundamental photo effects in Adobe Photoshop, making cool anaglyph 3D neon effect illustrator is actually rather easy.
ALSO READ: Your Ultimate Guide to Adobe Illustrator Brushes
Stereoscopy & Its Relation with Anaglyph Effect Photoshop
By viewing two slightly off-center images separately in each eye, stereoscopy is a technique that adds three dimensions to two-dimensional images. A stereoscopic effect, when two or more images are blended to create one, gives the final product a sense of depth.
Via a stereoscope, a pair of binocular devices that feed each eye its own image, you can view stereographic images, also known as stereograms.
An integrated 3D image is produced using the stereoscopic technique known as anaglyph 3D by combining two distinct red and blue images. Instead of using binoculars, viewers can experience the effect by donning glasses. Anaglyph images and stereo 3D movies can be viewed with the aid of red-blue 3D glasses.
ALSO READ: You Can’t Miss These Websites to Download GIFs
How to Implement Anaglyph Effect Photoshop?

Simply duplicate a photo, separate the red and blue color channels, and merge the filtered layers to create three-dimensional anaglyph images. Check out the detailed guide below if you have Adobe Photoshop and want to add a 3D anaglyph effect to a photo!
STEP 1
Open the image in Photoshop that has to be edited. After that, rename the background layer by clicking it twice and saying “left.” You must duplicate this layer and call it “right” by pressing Control-J.
STEP 2
Separate the color channels for green and blue. Choose “right” by doing a right-click. Next, select “Blending Options.” You will find a panel titled “Advanced Blending” in the “Blending Options” section. Access the RGB row. The letters “R,” “G,” and “B” stand for the red, green, and blue channels, respectively. The “R” channel is unchecked. Click OK.
STEP 3
Separate the color channel for red. Choose the “left” layer with a right click. Next, select “Blending Options.” You will find a panel titled “Advanced Blending” in the “Blending Options” section. Access the RGB row. The “G” channel is unchecked. Click OK.
STEP 4
Moving forward, choose the “Transform” and “Perspective” commands from the menu. This will help in changing the perspective of the first layer. You can also enlarge the image for a better working environment. Repeat the same process for the “right” layer. Always remember to enlarge both images by an equal number of pixels.
STEP 5
Shift the bottom layer. Use the left arrow on your keyboard 5 to 15 times to move the left image after selecting the Move Tool (V).
STEP 6
Shift the correct layer. Toggle to the “correct” layer. To align the two layers in the center, slide the right image 5–15 times to the right while pressing the right arrow.
STEP 7
Crop the last picture. To remove the colored image edges, use the Crop Tool and click. Have a peek at your 3D picture after putting on your red and blue glasses.
Anaglyph Effect Photoshop For Videos
Photoshop’s use of Anaglyph 3D is very great, but what about video? Adobe After Effects would be the tool of choice for video. After Effects is still your best option for converting live-action film and animated graphics to anaglyph 3D; even if you are working in Premiere, a technique known as 3D Glasses can be used to accomplish this. It is interesting to note that you can also convert a 2D video to Anaglyph 3D using Adobe tools.
It is included with After Effects and functions much like the Photoshop trick we just looked at; only it’s even easier! Follow the below steps to achieve it:
- To any video layer, add the 3D Glasses Effect.
- The layer you wish to present to each eye can be chosen. To make things easier, you should still direct the Left and Right views to the layer to which you wish to convert.
- Turn on Balanced Colored Red Blue for 3D Vision. To avoid having the effect not working properly with the normal Red and Cyan 3D glasses, don’t confuse this option with any other menu options with a similar name.
- Separating the color channels is the next step. Use the Scene Convergence property to do this by setting the value to a negative number. A higher number indicates more dramatic 3D depth.
- Again, just like in Photoshop, you can create a more realistic 3D experience by separating each object into its own layer and modifying the depth independently.
Wrapping Up
Many artists turn to anaglyph effect photoshop and leverage its powerful features to create mind-blowing visuals. You can learn to implement the effect in no time and get started on the journey of effective photo editing easily!
Many online survey building platforms are available, such as SurveyPoint, that you can use to create a survey related to stereoscopy and anaglyph effect Photoshop. These platforms allow you to create customized surveys with various question types, such as multiple-choice, open-ended, and rating scale questions, and provide data analysis and visualization tools.
Some possible survey questions related to stereoscopy and anaglyph effect Photoshop could include:
- Have you ever heard of stereoscopy or anaglyph imaging before?
- Have you ever created an anaglyph image using Photoshop or any other software?
- Have you ever viewed a 3D movie or image using anaglyph glasses?
- Do you think anaglyph imaging is an effective way to create a 3D effect?
- How important do you think stereoscopy is in the field of photography and imaging?
- Have you ever used any other stereoscopic 3D imaging techniques besides anaglyph?
- Do you think anaglyph imaging has any practical applications beyond entertainment?
Not Sure Where To Begin?
Explore our solutions to discover what is most important to your customers,
clients, and prospects. And best of all – it doesn’t take any coding!
Free Trial • No Payment Details Required • Cancel Anytime
