Make Your Surveys More Data-Rich With Drop-Down Matrix
The Drop-Down Matrix question type is an efficient way for respondents to answer multiple questions at once. It is presented in a tabular form, with a series of rows and columns, each containing a drop-down menu where respondents can select their answers. This format allows for quick and straightforward responses.
- To add this question type to your survey on SurveyPoint, open the workspace and click on “Create a new survey +”. You can also use our pre-made templates if you don’t want to start a survey from scratch.

- To create a new survey, click on the new survey. Once you do that, select “Long Form” from the pop-up.

- To create a new survey using the Long form, choose “ Start from Scratch”. This will allow you to manually input your questions and customize the survey to your needs.
- If you already have your questions saved in .csv file, you can also go with the option to “Upload CSV” and import your questions directly into the platform.

- After selecting your option, you will be redirected to another pop-up requesting you to fill out the required information. Simply give your survey a name and enter the other details.

- Now that you’ve created your survey, just click on the “Add Question” button in the “Create Survey” section to add a new question.

- Once you click on the button, the platform will automatically generate a question box for you.
- Alternatively, you may select the “Add section” button to make a separate section and add your question.

- To select the type of question, you would like to add, simply click on the drop-down menu under “Select Question Category” and choose the Drop Down Matrix option.
To make it simpler for responders to choose an answer, you can add drop-down menus to this question type’s several rows and columns. These are primarily closed-ended questions designed to facilitate swift and painless survey completion.
You can also add additional rows or columns to include multiple questions in a single question type.
- To add a column title, replace “Col 1” with your title. You can use the same procedure to add row text as well.
- To add a column and row, click on “Add column” and “Add Row” and give your columns or rows a title.

- Finally, let’s add drop-down choices to your question. Then click on the desired cell to add the drop-down menu.


- Now pick the format of the drop down you wish to add to that particular cell.
Here’s an explanation of the options:
- Textbox: This part will require the respondent to type in their response.
- Number: The respondents will be required to enter only numbers. This can be a good choice if you are asking about age.
- Decimal: This will restrict your respondents from adding or selecting only decimals.
- Select: Selecting the right answer allows respondents to pick from a range of options.
- Checkbox: Like select, the respondents can check the right options from the offered drop down choices.
- Radio: Respondents can complete several questions at once, much to the radio matrix format. In a nutshell, it empowers the respondents to pick the correct option from a list of alternatives.
To help you understand better, let’s proceed with Select as the format of drop down. Click on select to continue.
- Once you have clicked on the “Select” button, proceed to edit the options in the select matrix by replacing the placeholder text with your preferred choices.
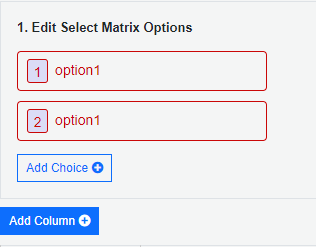

- You can also delete the rows and columns by hovering over the row/column you want to delete and clicking on “X”.
Question Settings
- Enable the Required option to make the question mandatory to fill out. It allows you to make a question compulsory for respondents to answer, preventing them from skipping the question during the survey.

Adding Design Elements
To modify the design of your questions, simply click on the small brush icon (design icon) situated on the sidebar.
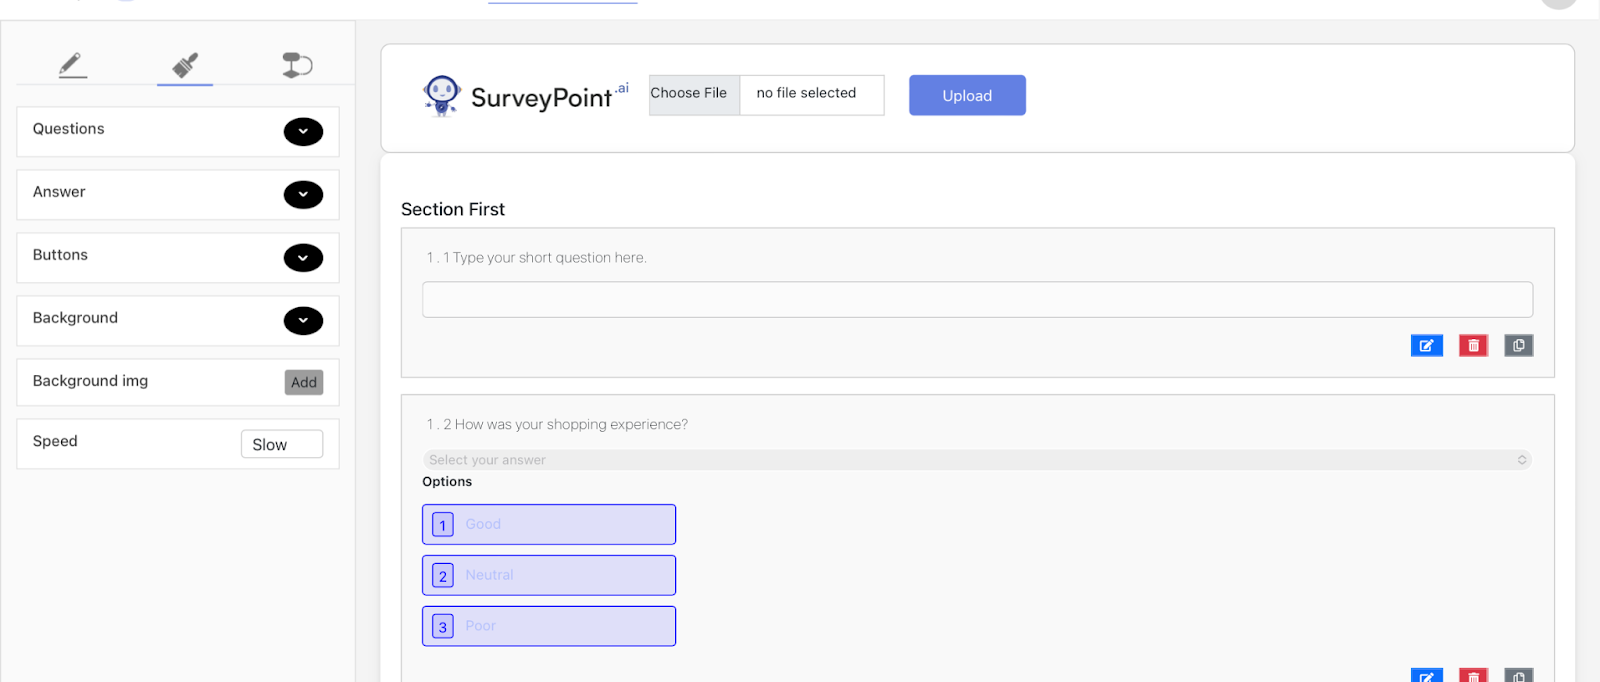
You can add different color options to question and answer by clicking on the down arrow option.
- Just click the arrow to choose the correct shade. Depending on your preference, you can use a grid, a spectrum, or some sliders to make your selection. This allows you to fine-tune the color and zero in on just the correct shade.
- You can also change the button color by following the same procedure.

- To incorporate a solid background to your question, click on “Background” and choose the desired color.


IMPORTANT NOTE
Please keep in mind that if you change the settings or designs of one question, similar changes will also be made to other questions in the survey.
Hope that solves all your doubts. However, if you still have questions, we are here to help.
Write to us at connect@surveypoint.ai, and we’ll get back to you as soon as possible.


