Multiple choice questions are close-ended questions requiring the respondents to choose one or more options from the given field to answer the question. They’re easy to answer, quick, and help the surveyor get a lot of data without a lot of hassle.
- To add an MCQ to your survey on SurveyPoint, open the workspace and click on “Create a new survey +”. You can also use our pre-made templates if you don’t want to start a survey from scratch.

- To create a new survey, click on the new survey. Once you do that, select “Long Form” from the pop-up.

- To create a new survey using the Long form, choose “ Start from Scratch”. This will allow you to manually input your questions and customize the survey to your needs.
- If you already have your questions saved in .csv file, you can also go with the option to “Upload CSV” and import your questions directly into the platform.

- After selecting your option, you will be redirected to another pop-up requesting you to fill out the required information. Simply give your survey a name and enter the other details.

- Now, to add a new question to your survey, simply click on the “Add Question” button located in the center of your screen under the “Create Survey” section.

- Once you click on the button, the platform will automatically generate a question box for you.
- Alternatively, you may select the “Add section” button to make a separate section and then add your question to there.
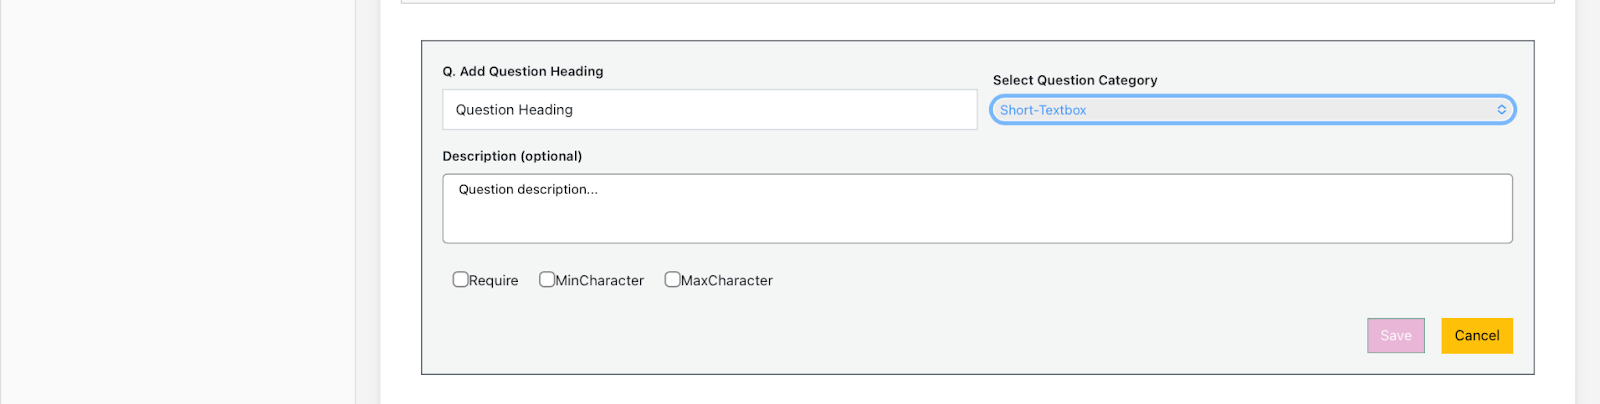
- To select the type of question, you would like to add, simply click on the drop-down menu under “Select Question Category” and choose the Multiple Choice option.

The next image shows what your MCQ would look like.

- Give your question a heading and add any additional description that may be helpful.

- Add your multiple choice options by replacing the placeholder text with your desired response choices.
- Below your last choice box, there is an option to “Add Choice” that lets you add as many choices as you desire.
Question Settings
To enhance the functionality of your questions, you have access to a set of additional settings options located below the description box. Let’s review each of these options one by one.

- The “Required” option allows you to make a question mandatory for respondents to answer, preventing them from skipping the question during the survey.
- If you choose the “Multi Selection” setting, respondents will be able to select more than one option, thus creating a multiple choice question with multiple selectable responses.
- “Randomize” shuffles the choices every time a new responder fills out the question. This eliminates any potential bias that may arise from the order in which the options are presented.
- The “Other Option” allows you to add another choice under “Other.” This can be helpful for respondents to fill out the question in case their answer is not listed as a choice.
- The “Other Option with text field” is similar to the other option. However, in this case, if respondents’ preference is not listed, they will need to specify their preference. This adds an open-ended touch to your close-ended MCQ.
To apply the desired setting options, simply check the corresponding boxes.
- With those steps completed, your new question is now ready to be added to your survey. To finalize the process, simply click on “Save” to save the changes you made.
- You can also edit, delete, or duplicate your added question. To apply, select the corresponding buttons in the bottom right corner of the added question box.

Adding Design Elements
To modify the design of your questions, simply click on the small brush icon (design icon) situated on the sidebar.

You can add different color options to question and answer by clicking on the down arrow option.
- Just click the arrow in the right corner to choose the correct shade. Depending on your preference, you can use a grid, a spectrum, or some sliders to make your selection. This allows you to fine-tune the color and zero in on just the correct shade.
- You can also change the button color by following the same procedure.

- To incorporate a solid color background to your question, simply click on “Background” and choose the desired color.


IMPORTANT NOTE
Please keep in mind that if you change the settings or designs of one question, similar changes will also be made to other questions in the survey.
Hope that solves all your doubts. However, if you still have questions, we are here to help.
Write to us at connect@surveypoint.ai, and we’ll get back to you as soon as possible.


